
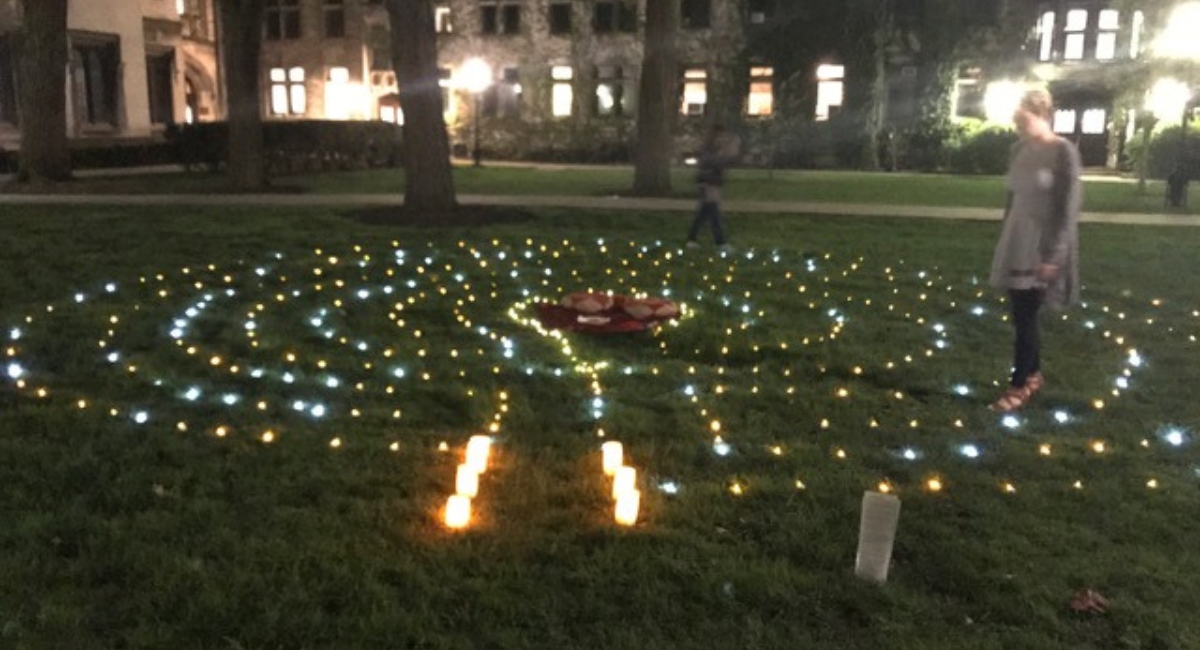
Many congregations have canvas labyrinths that can be used only indoors, while others have permanent labyrinths installed on the church grounds. What if you want to offer something temporary outside?
Bringing a Labyrinth to a Campus
Once or twice a year, Brent House, the Episcopal Center at the University of Chicago, offers an outdoor labyrinth for students. The life of a student is intense, intellectually challenging, and full of questions. We wanted a way to offer a time of reflection, a peaceful moment without expectations that transcends any particular religious tradition. The labyrinth has been a powerful way of offering a respite as well as a vision of a Christian organization that is open to a variety of spiritual practices.
How to Create an Outdoor Labyrinth
1. Choose Your Location
A temporary outdoor labyrinth can be set up on a parking lot or a lawn, anywhere flat and even enough to walk comfortably without having to worry about tripping over something. We do ours on the lawn in the main Quadrangles of our campus (having gotten permission from the university first). We have even made one inside using paper cups!
2. Gather Supplies
What does one use to draw a temporary labyrinth on the grass? Cornmeal has been our go-to. It is biodegradable, heavy enough to stay put, and looks beautiful. We usually bring about 50 pounds of cornmeal, although we generally don’t use it all.
We’ve also done the labyrinth at night using inexpensive battery operated tealights. About 100 should be enough. We usually still draw the lines in cornmeal to give us a guide for laying out the lights, with the added benefit of the labyrinth lasting a couple more days. The lights last for a long time, so you’ll have them for several events. You’ll want to plan for extra setup and cleanup time to include laying out the lights, turning them on and off, and picking them up.
3. Draw the Labyrinth
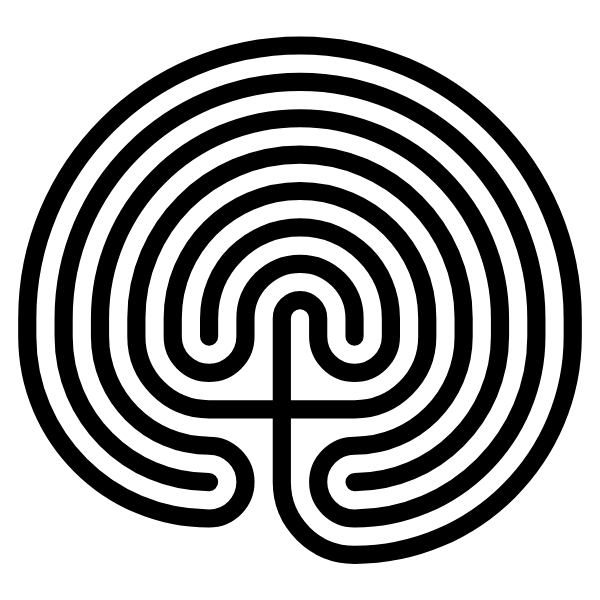
Drawing an outdoor labyrinth is fairly simple. You’ll want to use the Cretan, or seed, form, not the pretty Chartres form that most folks know.
The guide from Labyrinthos, “Laying Out a Labyrinth,” depicts these steps:
- Begin by making the “seed pattern”:
- Create an imaginary square by marking four corners a little below where you want the center of the labyrinth to be
- Make a vertical line through the center and a horizontal line through the center to form a cross
- Mark the halfway points between each corner and the cross lines
- Make L-shaped lines (keeping the vertical and horizontal lines equal in length) to connect the halfway points to one another in each quadrant of the square (upper left, upper right, lower left, lower right)
- Make a curved line, left to right, to connect the top of the cross to the halfway point at the top of the upper right quadrant. This will be your center, so make the curved line as big as you want the center to be.
- Make another curved line, this time right to left, above the first curve to connect the upper right corner to the halfway point on the top of the upper left quadrant.
- Make another curved line, left to right again, above the previous curve to connect the upper left corner around to the halfway point on the right side of the upper right quadrant.
- Continue making curved lines above one another to connect each of the points in turn, alternating directions (right to left and left to right), until you have the bottom of the cross connected all the way around the entire design to the halfway point on the bottom of the lower left quadrant.
The one thing we do differently is to make that first connecting line bigger so that we can have a center large enough to welcome multiple students. I’ll usually put a blanket or tarp for the center right above the seed pattern. Then we lay the first line, from the center to the top of the right angle to the right, around it.
Be careful not to skip a line; if it starts to get symmetrical (like connecting one of the dots to another), you’ve probably skipped something. I recommend practicing on paper a few times to get a sense of it. As you’ll see in the guide, you’ll want to set the pattern a little below center since the paths will be mostly above it.
As you lay the connecting lines, make sure to keep the distance between the lines wide enough for one person to walk. You will also want to take into consideration accessibility for wheelchair and other mobility support users as well as students who are blind or have low vision. When space allows, make the paths wide enough for wheelchair users to participate. You might also provide an alternative way to participate in the practice in order to include more disabled and non-disabled students by bringing handheld or paper labyrinths that folks can trace with a stylus or pen. You can find free printable labyrinths at this link: “Printable Finger Labyrinths” (World Labyrinth Day website).
We don’t have a special device for pouring the cornmeal (although I suspect something designed for laying out chalk lines on a sports field could work). We pour it out of the corner of the bag with gentle shakes for an even, visible line.
4. Add Inviting Elements
Once the labyrinth is drawn, we add meditation cushions in the center (which is why you want to make sure that first line creates a big enough circle). We often include a plate of cookies in the center because introspection is work! I recommend having an ingredient list or the original packaging on hand in case folks have questions.
Inviting Students In
Once your labyrinth is drawn, prepare to welcome folks. Be ready for lots of questions! “What is this?” “Is it Christian?” “Is it pagan?” “What do I do?” “Can I get it wrong?” “Do I have to take off my shoes?” “Is this like the movie ‘Labyrinth’?” (Answer: No, it’s not.)
You’ll want to have at least one or two volunteers to welcome people, orient them to the practice, and to debrief or answer questions afterwards.
We usually set up an easel advertising the event and draw teasers in chalk on sidewalks around campus. We also have a written guide with both the history of and suggestions for walking the labyrinth that we hand out. Mostly we suggest that they pause for a moment before they enter the labyrinth and bring a question or situation to mind, and we invite them to let go of the outside world and simply walk.
Students may stay in the center as long as they like, and as they walk the same path out, they are invited to reconnect with the outside world and notice any insights or changes in perspective. We also tell them that if they encounter another person on their path, they may simply step to one side to pass them.
The Response
Sometimes people walk to the center, decide they’re done, and simply walk across the lines to leave. We have also had students occasionally walk through the labyrinth, picking up a cookie as they go. It can be jarring, particularly for those who worked so hard to set up the labyrinth, but really, it’s fine. You’ve given them some moments of quiet and/or a sweet treat. That’s also ministry.
Students often appreciate a time with no agenda and knowing that there is a religious group that will offer this kind of no-strings-attached experience. Do have information about your community or ministry on hand. A few will want to know more!
Additional Resource
For more information on labyrinths, the Labyrinth Society is an excellent place to start.
Featured image is provided by article author, Stacy Alan; Cretan labyrinth image is on Wikimedia Commons and in the public domain