Drama at St. Dunstan’s
Drama – with kids; kids and youth; or all-ages – was a common part of our parish life before Covid. Back in March when I was asking myself, How do we keep feeling like St. Dunstan’s during this time? I recognized that finding a way to do drama was one way to continue our unique traditions. Since then we’ve done the Story of Balaam; a multi-scene Tale of St. Dunstan for our feast day; a five-part Story of Joseph for our Vacation Bible School; and more—we’re about to do a funny script based on the complaining stories from the Exodus wilderness journey, which some of the kids helped me write!
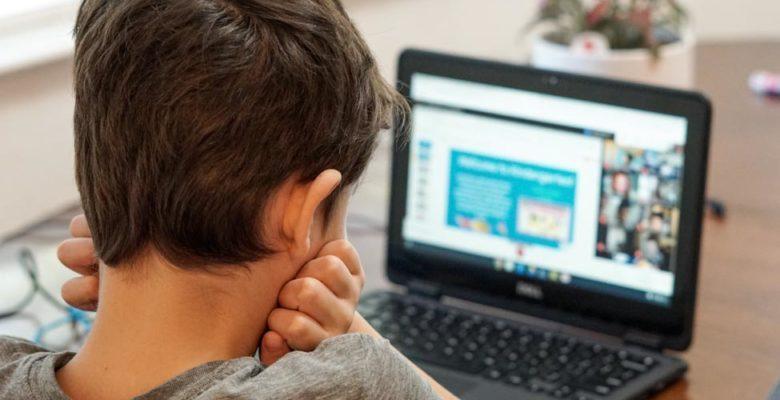
Some of our drama were produced “live” on Zoom and the Tale of St. Dunstan was compiled from scenes that households pre-recorded and sent to me for editing (check it out here). These tips pertain to drama recorded using Zoom, which will be presented in liturgy/formation sessions or shared with the congregation at a future date. If you’re curious about some of the pros and cons of each format, read more here.
Casting Tips
Auditions: I know my kids pretty well, so I don’t hold auditions, but I do check in now and then about what kinds of parts they’d like, and I do pay attention to kids growing and changing.
Open Invitation: I have a core group whom I know enjoy drama and do it well, but when starting something substantial, I also send an “open call” email to ask parents of kids who haven’t participated yet if they’d like to get involved, and if so, what their kid would enjoy and be able to handle.
I try to give every kid a part who wants a part, proportional to their skill and availability. It’s worked out well so far. Sometimes I split one character into two, or have two Narrators (for those who’d rather narrate than act), in order to have enough roles. Or sometimes I combine—in our Joseph cycle, we only had four brothers, which was plenty to cover all the necessary brother drama and dynamics!
Privacy & Security: Make sure parents and kids understand that you’re recording the drama to present to the congregation. If you want or expect to share it with a wider audience, get permission to do so. I feel that the “people with the link can view this” level of security on YouTube or Vimeo is secure enough—that makes it easy for the congregation to view it or for parents to share a link with extended family, but it won’t be stumbled on by outsiders. I also don’t list kids’ last names in the credits.
Memorizing: I do not ask anyone to memorize. It’s fine to act with a script in hand, whether we’re in person or on Zoom. I do ask them to mark their part, read over it a few times, and practice expression and using their big voices.
Costumes: You can suggest light costume based on stuff people have around. I’ve also dropped off more unusual or specific items of costume. For example, two matching robes for the Joseph story, one for Joseph to wear and one that was torn up and “bloodied” for Joseph’s brother to hold up.
Integrating High Schoolers: This may depend on your particular crop of kids and their relationships, but I have found that if I’m going to invite high schoolers to be part of the cast along with younger kids, it helps to have them in parts where they’re a) together and b) a little set apart from the rest of the cast. Some recent examples: The two oldest brothers in the Joseph story; the Magi in a pageant. Even on Zoom, where they aren’t hanging out together between scenes, this seems to help their willingness to participate.
Scripting Tips
- Choose a good story! There are so many of them in scripture, many of which don’t make the Sunday lectionary. Don’t shy away from bloody stuff or scary stuff. It won’t faze most kids.
- I write my own scripts, recently with input from some of the kids, which was fun! I often start from the Common English Bible text of the story I want to tell, because it’s simpler and easier to understand, but I will also look at the NRSV. Sometimes its phrasing is better or more elegant. Some characters or speeches really should sound like scripture.
- I try to write with my cast in mind. This isn’t always possible, but it means I can develop the parts and the lines proportionate to the actors’ gifts and capacities.
- I try to make sure both actors and audience can understand what’s happening as I work scripture into a script. A lot of the plotting and emotional dynamics in scriptural texts are expressed very sparsely, so I’ll try to draw them out in the script. Here’s an example – chapter 1 of our script for the Story of Joseph.
- Note: You’ll see I explain that Jacob is the same person as Israel, but I use the name Israel throughout the script, both because the names “Jacob” and “Joseph” are easy to mix up and because I want the kids to start to understand that the people Israel we talk about in church a lot are the people descended from Jacob/Israel. These are the kinds of choices you’ll want to think about!
- Work on making the script, as a document, easy to read! Use a large font (14 to 16 point) and put the role names in all caps, so that it’s easy for kids to scan and spot their lines. Use page numbers so you can say, “Okay, let’s take it from the top of page 3.”
- Try not to have really short lines. You’ll be relying on Zoom’s built-in “shift to the speaker” mechanism. If a line is very short, Zoom won’t shift to that speaker fast enough. You’ll still have the audio in your recording, but not a visual. For example: In our first Zoom drama, about Balaam, I gave the donkey some “Hee-haws!” before she real lines, so she’d be present in the story earlier. But even a double “Hee-haw! Hee-haw!” wasn’t long enough for Zoom to switch over and show the actor playing the donkey.
Recording Tips
Setting: Check the Zoom recording settings. You want to make sure you have “Record active speaker” checked. If you only record gallery view, you’ll see everybody all the time, and won’t zoom in on the current speaker.
Experiment: Make sure you have permission to record, on whatever Zoom account you’re using. Find the settings and do a test session with just yourself. You may have to choose between recording on your computer or on the cloud. I record to the cloud & then downloaded later.
Recording With The Cast: Gather kids on Zoom at the appointed time. Here is my tried and true format: Read-through; Notes; Record. This tends to take about 40 minutes, though of course it depends on script length.
- First, check in briefly to see if there are any initial questions – words people aren’t sure how to pronounce, plot points they don’t quite understand.
- Read through the drama once, with everyone reading their parts – a virtual “dress rehearsal.” Take notes as you go; it’s wise to have the script printed out beside you so you can scrawl on it.
- After the first read-through, take a few moments to share “notes” – somebody’s Zoom background is distracting; can you do that costume change a little earlier; can you get closer to your mic or speak more loudly; let’s hear this line ANGRIER; that kind of thing. The kids may have notes for each other or themselves, as well.
- Then, do it again and record it this time!
Muting: I tell actors that if there’s a big chunk of the script when they don’t have lines, it’s fine to mute, but they shouldn’t mute/unmute between lines on a page of the script when they’re speaking. That makes it too likely that someone will fail to unmute when they have a line.
Editing Tips
If You Don’t Have Time/Capacity to Edit
Just start the recording, then you may want to say something like “The Story of Joseph, Chapter 1,” so that your first speaker has a nice clear cue to begin. If anyone misses a cue or fumbles a line, just keep going and make the best of it. Kids will quickly get frustrated and tired if you re-do stuff.
If You Do Have Time/Capacity to Edit (I strongly recommend this; it doesn’t take long once you’ve gotten the hang of it and really takes some pressure off the recording process!)
- Re-Do’s Are Fine: I tell the kids that if anyone muddles a line and isn’t happy with it, just pause for a few seconds and then read it again. That’s easy to edit out. Likewise, if somebody misses a cue, just wait until they notice and come in. It’s easy to spot and edit out pauses.
- How To Start Recording: For an easy-to-edit clean start, I recommend doing exactly this. 1. Start recording. 2. Say, clearly, “OK, we’re recording now. [First Speaker], wait a few seconds, then say HELLO nice and loud, then start your first line.” When they say “Hello,” Zoom will shift to them, so you should have them as the active speaker when they start their first line. It’s easy to edit out your line and the “Hello.”
- Editing: I use iMovie, which has all the tools I need. I had to learn a few things – mostly how to add a title and credits; how to edit out a few seconds of the recording; and how to bring up the volume on one section of the recording if one speaker is quiet. I found watching the audio line of the recording helpful – you can see pauses and edit them out; cutting out even short pauses will help the recording feel smoother and more engaging. Our finished products are not polished but they are a lot of fun! The congregation enjoys them and I think the kids feel proud of them.
Sharing Tips
- I have a low-tier Vimeo paid account, because Vimeo will let you pay to upload larger/longer videos. I have shared both by putting links on the church website and by embedding video there (Vimeo walks you through that pretty well).
- If you share on Facebook, bear in mind that Facebook will compress the video a good bit. Zoom video is not terrible quality, but once Facebook has compressed it, it looks kind of bad. Better to invite people to view directly on Vimeo or YouTube if you can.